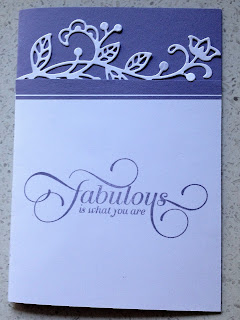
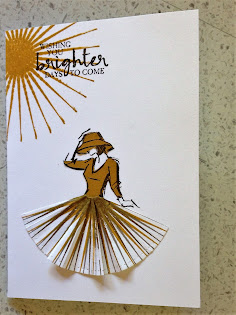
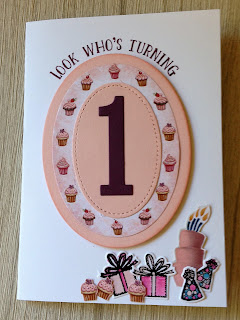
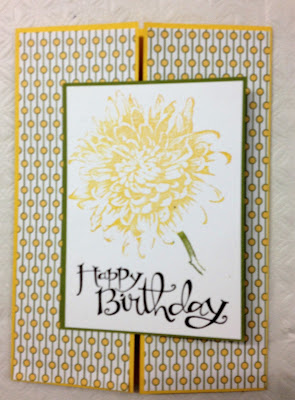
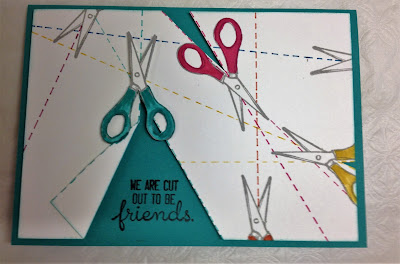
After such a full on and fiddly class last week, I promised my ladies something a bit simpler. Well these cards are definitely a lot simpler, however they do have some interesting folds, one of them made with my favourite tool, the Envelope Punch Board.
This class is for the men in our lives. Masculine cards are so hard to make as most of us are so used to flowers, hearts and bows. Well we may see a bow, so come along and see for yourself.
If you would like to attend this class and make 3 masculine cards, please let me know as soon as possible as places fill fast.
When:Wednesday 31st May 10am
Cost: $10
Where: Zena's Craft Studio in Wellington Point (email me for the address)
Please RSVP so that I can prepare all the kits. Please bring your ‘basic kit’ to class, this includes a paper trimmer, tape runner, double sided foam tape, multipurpose liquid adhesive and scissors, as well as your Envelope Punch Board if you have one.
* If you are a beginner and do not have a kit, there will be kits available for sale.
Search This Blog
Sunday, May 28, 2017
Thursday, May 25, 2017
All I can say is "Wow"
One of my team has just made the most beautiful card I have seen for a wedding in ages. Sarina has only been a Stampin' Up! demonstrator for a few months and she is enjoying playing with all our lovely products.
This card she made used Stampin' Up's Dazzling Diamond Cardstock, Detailed Florals Thinlits, and the leaf from the Rose Garden Thinlits. She wanted to replicate the lace on her daughter's dress.
Sarina agreed that I could share her card, what do you think of it? All I can say is "WOW"
This card she made used Stampin' Up's Dazzling Diamond Cardstock, Detailed Florals Thinlits, and the leaf from the Rose Garden Thinlits. She wanted to replicate the lace on her daughter's dress.
Sarina agreed that I could share her card, what do you think of it? All I can say is "WOW"
Thinking outside the square with our dies
Flourishes, circles and flowers with a little twist.
By placing the cutting plate only where you want the cut to finish you get a partial shape cut through. The rest is cut away with a scalpel to create a straight line.
Can you see what I meant ? Sometimes I'm a bit hazey at describing how to do something, seeing how it is done is easier for me. So I do hope you can see how this was done.
I loved doing this one, such a delicate design and I have someone in mind to send this to after class. The three flowers were cut out of Pink Pirouette card, using the Flourish Thinlits. Another set of flowers was cut out of Pink Pirouette. A piece of Whisper White is placed inside to show through the cut out area. One of the sets of flowers was then adhered in over the Whisper White. Then the other set of flowers was adhered on top giving a deep design to the flowers.
The sentiment I chose was from the stamp set You've Got This, another favourite. An extra little flower was added to finish it off.
The last card started out quite plain on the outside, as it was supposed to be all about the inside popping, however it didn't work out as I had thought and the outside is just as busy as the inside.
The inside was created as a pop up by placing the plates over the circle and leaving a smidgen not covered so that it did not cut. The flower this time is stamped from the Special Reason stamp set, along with the sentiment on the front and inside.
By placing the cutting plate only where you want the cut to finish you get a partial shape cut through. The rest is cut away with a scalpel to create a straight line.
Can you see what I meant ? Sometimes I'm a bit hazey at describing how to do something, seeing how it is done is easier for me. So I do hope you can see how this was done.
The bottom of the Whisper White layer was stamped in Wisteria Wonder with the sentiment out of an old but favourite stamp set Million and One. This layer was adhered to a base of Wisteria Wonder and two strips of Wisteria Wonder were adhered just below the thinlit cut out.
I loved doing this one, such a delicate design and I have someone in mind to send this to after class. The three flowers were cut out of Pink Pirouette card, using the Flourish Thinlits. Another set of flowers was cut out of Pink Pirouette. A piece of Whisper White is placed inside to show through the cut out area. One of the sets of flowers was then adhered in over the Whisper White. Then the other set of flowers was adhered on top giving a deep design to the flowers.
The sentiment I chose was from the stamp set You've Got This, another favourite. An extra little flower was added to finish it off.
The last card started out quite plain on the outside, as it was supposed to be all about the inside popping, however it didn't work out as I had thought and the outside is just as busy as the inside.
The inside was created as a pop up by placing the plates over the circle and leaving a smidgen not covered so that it did not cut. The flower this time is stamped from the Special Reason stamp set, along with the sentiment on the front and inside.
Wednesday, May 24, 2017
FREE Envelope Punch Board lessons this weekend
This is the last call for this weekends Envelope Punch Board Free lessons. I have 2 spots left one on Saturday and one on Sunday.

For those that did not purchase their Envelope Punch Board from me, you are still invited to attend one of these lessons. All I ask is you bring your own 12x12 papers and card stock as well as pay $5 for the step by step instructions you will be given.
I do hope you can make it, please let me know which session you will be coming to and feel free to bring extra papers if you want to have a play after the lesson. I'd like everyone to go home loving this little tool as much as I do.
Want to purchase one and join us head over to my online shop and it will be posted directly to you.
The dates I have set aside are...
Saturday 27th May 10am - 12noon
Sunday 28th May 10am -12noon
Cost: Free for my Envelope Punch Board customers
$5.00 everyone else
I am very flexible with these times as it is a play day so feel free to come later and stay later, just let me know.
Please bring your Envelope Punch Board with you and extra paper and card if you want to stay back and play.
Tuesday, May 23, 2017
Colour Challenge#9
When I joined in on a Facebook Group called Colour INKspiration I thought it would help stretch my creativity a little. I am pleased to say I am enjoying each challenge and this one I particularly loved. The colours are Cherry Cobbler, Dapper Denim and Pool Party, all colours that I love and actually use quite a bit. However it was the photo that they put up for inspiration that had me hooked. I just loved the collage of images and colours so I decided to just recreate it with my Stampin' Up! products. I enjoyed making a collage in a frame last week for my great niece's first birthday, so decided another frame was just the ticket. Oh and if you are looking back at past posts to find the other frame, no, I have not put it up yet as I wanted it to be a surprise. So stay tuned it is coming.
So what do you recon, isn't this the most inspiring piece of art?
.
I was going to draw the lady myself but then decided to use the Beautuiful You lady and dress her in the challenge colours. Her dress was striped Dapper Denim and I coloured the white in with a Cherry Cobbler Write Marker. Her had is Cherry Cobbler with a fringe of Dapper Denim ribbon.
The top and bottom panel she is in has an old retired Build a Blossom stamp set stamped and punched out and then sponged.
The big side panel was sponged, the trees were inked up on the woodland embossing folder and then fussy cut to go over the sponged base.
The whole lot was layered on to some very old retired DSP that I had wiped my Cherry Cobbler ink pad over and then wet a very wide paint brush and wiped it across the paper.
So there you have it my version for Colour INKspiration #9.
It is now in a black frame and my husband has taken it and put it on our TV display cabinet and wants it to stay. Isn't he the sweetest?
Monday, May 22, 2017
Same, same done and dusted
I love when a card design can be made to look so different and yet use exactly the same stamps and embellishments.
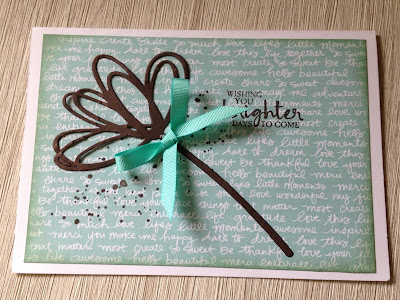
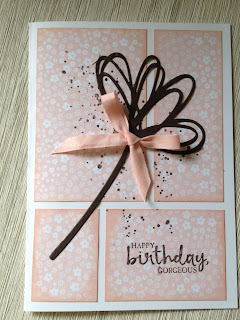
This is what we did. All bases were Whisper White, the ink was Early Espresso and the stylised flower from the Sunshine Wishes Thinlits was used on each card.
The first card was one layer, sponged around the edge. My favourite Gorgeous Grunge stamp is used randomly, using Early Espresso Ink, the flower was adhered and then a sentiment from the Beautiful You Stamp Set was chosen. The colour of the bow was chosen to coordinate with the DSP.
So simple, but so stylish in Pool Party.
We moved on to the next design. The top layer was dived into three panels, sponged, stamped with Gorgeous Grunge again, then assembled same as the first. The ribbon was too wide for a bow but looked great just tied in a knot. Easy ey!
This one we did in So Saffron.
We finished off with Pink Pirouette. The DSP was cut down from the short side 4cm and thethe bottom up 4cm, the bottom 2 pieces were flipped for the look I was after. The four pieces were sponged, stamped with Gorgeous Grunge again, then assembled same as the first. The four pieces could be cut to accommodate a bigger sentiment if necessary, but I found the 4cm size fits many different sentiments. The Pink Pirouette bow finished the card nicely.
Lucky last is pretty cute.
So what do you recon, same, same but different works pretty well don't you think? Use up all those gorgeous papers you have been hoarding and quickly make up a stash of cards ready to go.
If you would like to replicate these cards pop on over to my online shop and get these products sent straight to your door. (Gorgeous Grunge is no longer available, sad face)
Wednesday morning class to die for
Everyone has Big Shot dies and framelits and make some lovely projects with them. However do you ever think of other ways of using them? I have been having a little play and our class this Wednesday will show how we can make them go a little further.
f you would like to attend this class and make these 3 gorgeous cards, please let me know as soon as possible as places are filling fast.
When:Wednesday 24th May 10am
Cost: $10
Where: Zena's Craft Studio in Wellington Point (email me for the address)
Please RSVP so that I can prepare all the kits. Please bring your ‘basic kit’ to each class. This includes a paper trimmer, tape runner, double sided foam tape, multipurpose liquid adhesive and scissors.
* If you are a beginner and do not have a kit, there will be kits available for sale.
Tuesday, May 16, 2017
Quench Your Thirst with Succulents
Stampin' Up! know you are always looking for new projects, so they have some succulent projects to quench your thirst! These projects feature the Oh So Succulent Stamp Set from the occasions catalogue. Treat yourself to a fun time stamping, maybe you could gather your friends and make the projects together with the instructions Stampin' Up! have created.
I have the Instructions from Stampin' Up! and would love to share them with you. Let me know if you have the stamp set and would like the instructions. I will email them to you. I am going to have a play with these on the weekend I recon.
If you haven't got this set yet and would like to purchase it, contact me or go online and purchase from my shop.
Beautiful You goes to the beach
During the Friday night class, one of the girls wanted to make a mothers day card from one of them. She wanted it to have a beachy theme as her mother in law lives on Stradbroke Island. She didn't want to use the middle one or the end one. So after a few suggestions and a fiddle with the left over half circle I came up with using it as a sarong tying a belt on the hips with Linen Thread. The hat we made from Tip top Taupe and tied Linen thread around the band. She stamped Happy Mother's Day on the layered strips.
I had a few halves left over. So while we were chatting I fiddled and came up with another sarong. That fixed one half, what could I do with another? Why not have her hold an umbrella and paper piece it. So I did and this is my version, unfortunately I didn't take a photo of my friends lovely card.
I had a few halves left over. So while we were chatting I fiddled and came up with another sarong. That fixed one half, what could I do with another? Why not have her hold an umbrella and paper piece it. So I did and this is my version, unfortunately I didn't take a photo of my friends lovely card.
Monday, May 15, 2017
FREE Envelope Punch Board lessons

Every time a person purchases an Envelope Punch Board from me they receive a FREE lesson on how to use it. I am happy to say that I have now decided to hold two FREE lessons. If neither of these days is suitable, can you let me know and we can arrange for your lesson at a suitable time.
This invitation is also extended to everyone that has already had their free lesson afer purchasing the board from me. I'd just like to give you the opportunity of a refresher and I have a great little project that takes the board to a great new level.
For those that did not purchase their Envelope Punch Board from me, you are still invited to attend one of these lessons. All I ask is you bring your own 12x12 papers and card stock as well as pay $5 for the step by step instructions you will be given.
I do hope you can make it, please let me know which session you will be coming to and feel free to bring extra papers if you want to have a play after the lesson. I'd like everyone to go home loving this little tool as much as I do.
Want to purchase one and join us head over to my online shop and it will be posted directly to you.
The dates I have set aside are...
Saturday 27th May 10am - 12noon
Sunday 28th May 10am -12noon
Cost: Free for my Envelope Punch Board customers
$5.00 everyone else
I am very flexible with these times as it is a play day so feel free to come later and stay later, just let me know.
Please bring your Envelope Punch Board with you and extra paper and card if you want to stay back and play.
Sunday, May 14, 2017
Christening card quickie
Sometimes during my card classes a special sentiment is requested. In this case an entirely different card was requested as a Christening card for a very special person was needed. Ok, challenge on, what have I got for a Christening card?
I found this Trefoil Cross a very old stamp set that I just cant part with. This went on the front of a Note card, then she wanted something for the inside.
The sentiment on it's own seemed a bit lost so, more umming and aahing and we came up with the Kinda Eclectic stamp set. We were all tickled pink with how this turned out. Phew, talk about thinking on your feet.
Same same, but different - Wednesday card class
I wanted to see what I could come up with using pretty much the same framelit and Designer Series Paper. There is not always the need to have a zillion framelits (although I come close to having that many, smile!)
I wanted to use only the one and just change it around a bit.
Want to see how?
If you would like to attend this class and make these 3 gorgeous cards, please let me know as I need to prepare the kits.
When:Wednesday 14th May 10am
Cost: $10
Where: Zena's Craft Studio in Wellington Point (email me for the address)
Please RSVP so that I can prepare all the kits. Please bring your ‘basic kit’ to each class. This includes a paper trimmer, tape runner, double sided foam tape, multipurpose liquid adhesive and scissors.
* If you are a beginner and do not have a kit, there will be kits available for sale.
Saturday, May 13, 2017
Simple does it
Why do we all look for fancy cards, lots of arty farty techniques to come up with a gorgeous card? I had a special request for a class with very simple cards. Only 2 people were to attend this class, one that had never crafted in her life before. I created 3 cards and we spent a lovely morning getting excited about how simple can be so classy.
One was a Rip and Flip card. Cut some Designer Series paper an inch longer than the card base, now rip it! Now, flip one of the pieces and adhere, add a sentiment and a cute peg, Voila!!
Such a pretty uncomplicated card, don't you agree?
Stamp a beautiful lady, add a sentiment and a 3D balloon only one layer and yet another simple card is created. The morning is going well and we are all having fun.
Finally stamping a load of baloons, add a 3d baloon, stamp a sentiment in a banner and the third card is completed.
Three simple cards, no stress and everyone had a lovely morning. I think I need to do this more often.
Friday, May 12, 2017
Happy First Birthday sweet Maddy
Last week we went to the first birthday of my great niece. She is the cutest little girl, of course I'm not prejudiced at all, haha.
So I wanted to make something very special. One of our fellow demonstrators Ann Lewis made a gorgeous frame using our new designer series paper that is coming out in the new catalogue in June. I loved it so much that I had to CASE it immediately. Here is my version.
The Birthday Memories Designer Series Paper is adorable and the best part is that it has framelits that can cut out many of the images.
Her birthday card was created with the left over bits, not that you would know they are left overs! I am really pleased with how they turned out.
I also stamped the inside with a collage of stamp sentiments. Do you recognise the Happy Birthday Gorgeous? This stamp is from Beautiful You stamp set. I masked the sentiments before I inked the Happy and used the stamp-a-ma-jig to line each word up.
I have decided that I am going to make this a family tradition. Each year I will make another collage to go in the frame and then the old one can be scrap booked with the birthday photos. I wonder what she will get next year.
Thursday, May 11, 2017
My Bluecare Friends
Monday afternoons are a real treat for me as I go visit my friends at Bluecare. I teach them how to make simple cards and I am always thrilled when some of the older ones master a new technique. I have been away for a while with some doctors visits and a big birthday holiday so it was a great catch up today. I also have a new lady who couldn't thank me enough at the end of the class.
If you are retired and have a few spare hours, you might like to think about volunteering at your local Bluecare or other aged facilities. You will be surprised and thrilled at how much these people respond to a challenge. I have been doing this for several years now and I believe I get more out of it than the residents.
My oldest resident is very proud of the fact that he can now master the Snail adhesive. Yes I did say "he", this lovely man is 98 now and quite frail, but he still manages to glue his own cards as well as stamp and punch.
When I first started, I used to prepare most of the cards for them, giving them an easy task of just gluing and maybe tying a bow. How wrong I was. I soon realised, they needed more than this. These people were quite capable if given the chance. They love a challenge, sometimes I take my Big Shot in and they grind away cutting out shapes for their cards or using the embossing folder.
This is one of the cards we made today. Pretty simple, as it was me that needed to get back into the swing of things, after being away for a bit.
Wednesday, May 10, 2017
Sydney OnStage
I had the privilege of being one of the presenters at a Stampin' Up! event in April. I was asked to present the new Angel Policy Stamp Set that we will be able to purchase in the upcoming 2018-19 catalogue.
These are the projects I presented with the Crafting Forever stamp set.
These are the projects I presented with the Crafting Forever stamp set.
Tuesday, May 9, 2017
Friday evening class
This Friday evening class is the same as our Wednesday morning class for the ones who had missed it, We will be making cards using one of my favourite stamps set, Beautiful You. I have made up these cards for a colour challenge with Colour INKspiration and decided I liked them so much that I would have them as this weeks class.
This is what we shall be making.
We will be water colouring this card.
We will be fussy cutting this card.
(For those that wanted to know how I did the skirt. I stamped the image on our White envelope paper that is now retired and then used the Stamp-A-Ma-Jig to stamp each colour layer, just moving it slightly each time. Then I just cut the circle in half, folded in half, then in half again,then in half yet again. Unfolded and stuck down sides but left a few pieces loose with just a glue dot holding it down, I tucked the waist under to form a curve)
We will be using our Stitched Shapes Framelits dies on this card and leaving it blank for those that may want a male version.
So do these cards excite you? If you would like to attend this class and make these 3 gorgeous cards, please let me know as soon as possible as places are filling fast.
When:Friday 12th May 7pm
Cost: $10
Where: Zena's Craft Studio in Wellington Point (email me for the address)
Please RSVP, so that I can prepare all the kits. Please bring your ‘basic kit’ to each class. This includes a paper trimmer, tape runner, double sided foam tape, multipurpose liquid adhesive and scissors.
* If you are a beginner and do not have a kit, there will be kits available for sale.
The saga of my froggy
I love frogs. I especially love the huge green frogs that used to live inside our downpipes and croak happily every time it rained. Over the years friends and family have given me a collection of frogs and last year my darling husband found a perfect one for me that was going to be my Christmas present. He had been visiting a gallery in Montville with his cousin from New Zealand when he found it. He was so excited and told them that I would absolutely love it and that he had to hide it till Christmas.
Well that was in July, so after a few months of going on trips and working around our home, the frog was forgotten till Christmas came around. On Christmas day I received a lovely voucher for a pamper day. His cousin emailed from NZ asking how I had enjoyed my special Christmas present. I said I was thrilled with the pamper day. Nooooo, what happened to the special pressie. Yep, you guessed it, froggy could not be found. Well the panic and racking of the brain came up blank. Pulling out cupboards and draws also turned a blank. Finally just a few weeks ago I was in our spare wardrobe going through some winter clothes and guess what I found hanging in a paper bag on a coat hanger!
Yep my froggy. I am so thrilled with it, the photo does not do it justice. The frog is hiding in the gum leaves, isn't it so lovely. If anyone would like one of their own or any of Lindsay Muirs other creations then check out his website. I love his snakes too, although that may not be everyone's cup of tea.
Monday, May 1, 2017
Beautiful You - Wednesday class
Gosh can you believe it is May already. Another few weeks and it will be Christmas in July classes. Well until then let's make the most of our time doing what we love with stamps, ink and paper.
This Wednesday we will be making cards using one of my favourite stamps set, Beautiful You. I have made up these cards for a colour challenge with Colour INKspiration and decided I liked them so much that I would have them as this weeks class.
This is what we shall be making.
We will be water colouring this card.
We will be fussy cutting this card.
(For those that wanted to know how I did the skirt. I stamped the image on our White envelope paper that is now retired and then used the Stamp-A-Ma-Jig to stamp each colour layer, just moving it slightly each time. Then I just cut the circle in half, folded in half, then in half again,then in half yet again. Unfolded and stuck down sides but left a few pieces loose with just a glue dot holding it down, I tucked the waist under to form a curve)
We will be using our Stitched Shapes Framelits dies on this card and leaving it blank for those that may want a male version.
So do these cards excite you? If you would like to attend this class and make these 3 gorgeous cards, please let me know as soon as possible as places are filling fast.
When:Wednesday 3rd May 10am
Cost: $10
Where: Zena's Craft Studio in Wellington Point (email me for the address)
Please RSVP, so that I can prepare all the kits. Please bring your ‘basic kit’ to each class. This includes a paper trimmer, tape runner, double sided foam tape, multipurpose liquid adhesive and scissors.
* If you are a beginner and do not have a kit, there will be kits available for sale.
Subscribe to:
Posts (Atom)
