Search This Blog

Would you like to join Stampin' Up!® - Come join my team, get discounts and make new friends. As long as you are in Australia you can join my team.
Showing posts with label early expresso. Show all posts

Monday, June 19, 2017

Colour INKspriation's new challenge

Did you know, Colour INKspiration is on Facebook and this is the eleventh Colour INKspiration Challenge – CI11

This fortnight we have 3 colours Marina Mist, Early Espresso and Soft Suede to use to create our projects. Other neutrals are welcome such as Black, Whisper White, Crumb Cake, Very Vanilla, Sahara Sand and Metallics.

Colour INKspriation CI11 zena kennedy independent stampin up demonstrator

So would you like to join the challenge? Then jump right in and get your creative hat on, make something with these colours and upload your picture at Colour INKspiration.

This coffee inspired colour palette stumped me for a while as I was wanting to continue on my own personal challenge, by trying to recreate the inspirational piece. The last 2 Inspirational pieces had been a collage of images. These images made it easy for me to create a collage to put into a frame.

Well I couldn't create a collage so decided to just make a card. I brought out my Large Letters framelits and with Washi Tape to hold them in place I cut out the word love on my Whisper White card.

large letters framelits zena kennedy independent stampin up demonstrator

Then I tapped the Marina Mist ink pad on one of my very old and crinkled Big Shot plates, I then tapped the Early Espresso on and finally the Soft Suede.

 zena kennedy independent stampin up demonstrator

Then I spritzed the plate and let them run into each other. It actually made some interesting colours. I then smooshed my card onto the plate.

large letters framelits zena kennedy independent stampin up demonstrator

I then cut out several LOVE pieces and adhered them together and popped into the the LOVE opening. This raised them up quite substantially from the base card. Then I came to a road block. I didn't like it as a romantic style card. Um, what to do!! I cut it and mounted it on a piece of Marina Mist card. I also mounted the off cut on to Marina Mist. This looked wrong as well, so I rubbed up the edges with my scissors to make a shabby frame. All of a sudden the "lightbulb" moment happened. I had a very old retired Coffee cup stamp set Coffee & Friends the perfect blend in my stash and the words on one of the sentiments was "Coffee & Friends are the Perfect Blend" I decided to create a frame after all and have the words LOVE IS COFFEE & FRIENDS THE PERFECT BLEND.

I cut out Whisper White card for the base, stamped the coffee cup stain from the Timeless Textures stamp set randomly over the card. I stamped "IS" by inking up in Marina Mist and then using the rock and roll technique to add some Early Espresso. Below this I stamped the words Coffee & Friends in Early Espresso (I masked the rest of the words out)

coffee and friends zena kennedy independent stampin up demonstrator

The cups were stamped, one using a Whisper White base, the other using a Soft Suede base. The white cup was water coloured softly with Marina Mist and Early Espresso, then a vellum band was added and coloured with Wink of Stella. The Soft Suede cup had the band stamped with the words "the perfect blend" All the rest of the wording was masked.

coffee and friends the perfect blend zena kennedy independent stampin up demonstrator

3 vellum daisies were punched out, with the Daisy Punch, Early Espresso ink was tapped over one and Marina Mist over the other. I pinched the petals and rubbed with a stylus. One I left plain and just used my stylus to create some shape.

 Daisy punch zena kennedy independent stampin up demonstrator

The beans, I drew freehand and cut each one out, gee, I wish I had the new stamp set Coffee Break it has coffee beans in the stamp set.

coffee zena kennedy independent stampin up demonstrator

The Whisper White base looked too sterile even though it had coffee stains over it, so I sponged with Early Espresso and Soft Suede. I screwed it up and sponged on the creased bits to make it look really messy. The last touch was to scrape up the edges.

Now I was happy with the shabby look. I needed the black frame hidden, it looked too stark, so I cut strips of Early Espresso Co-ordination card and sanded it.
The corners, I mitred and adhered to the black photo frame.


So finally my Colour INKspiration #CI11 is now done and dusted and I like it. I am so pleased I managed to make this project and not the card that it started out to be. I am also thrilled that my last project was selected in the Top 5, thank you to everyone that voted for me.

My husband has already decided that it is going to go on our kitchen wall above the coffee machine.

Thursday, April 25, 2013

Who loves Masking and Sponging?

I love Masking and Sponging. It makes everyone a bit of an artist and who doesn't like to think of themselves as a modern day Monet. We did three styles of this technique. The first using our beautiful and very large Swallowtail stamp. It was embossed with black embossing powder and then sponged using sponge daubers and three colours. Then a mask of the  butterfly was placed over the the stamped image and then the outside was sponged to make the butterfly pop.


Yes I know , you are probably saying "that looks like silver embossing to me" Yes you are right. I did many samples using all the different powders and this one took the best photo.

The next style of masking is one of my favourites. It always looks so difficult but the consensus was that it was the easiest and made a really WOW card.

I ripped some scrap paper in half to make two ragged edges. Then this is placed on the card leaving an area to sponge. The sponging in this technique uses a sponge rather than sponge daubers. I still like to use three colours for the first layer. Then I randomly stamp a few shapes or writing in either Early Expresso or one of the sponged colours, depending on what effect you are after. Then the scrap paper is removed and  WOW!

This is called Reverse Masking.


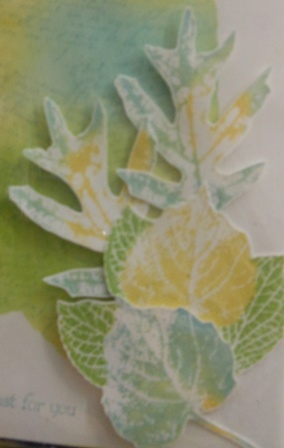
This one here is a mixture of Reverse masking and masking. If you look closely  you will see the leaves have been masked and then cut out. I got the background effect by ripping a hole in a piece of paper and then applying the ink the same as the one above.


Lastly we did this little cutie. I love this style of masking but it can, be a little frustrating to get the mask just right. The secret is to use very thin paper, something like post it notes, and the more you use it the better, as it makes the mask paper thinner. Another tip is to cut the mask a sliver smaller than the image so that you do not get the white halo around it.
 
 
With this one the bashful blue heart was stamped first, a mask was then placed over it. Then the Crumb Cake heart was stamped slightly over the mask. Another mask is then needed for this heart. Finally the Always Artichoke heart was stamped and then the masks removed. Now it looks like the blue is in front and the green is at the back.

So what do you recon? Going to have a go at masking? Go on have a go and let me know how you went, I think you will love it.

Saturday, February 16, 2013

On a roll

Well I had a productive day today. I finished creating the 3 cards for my next stamp class in March and have even written instructions for 2 of them with pictures. So make sure you keep either Wednesday 6th or Friday 8th free and come along for a big night.

I then wanted to stock up on some cards so here they are.

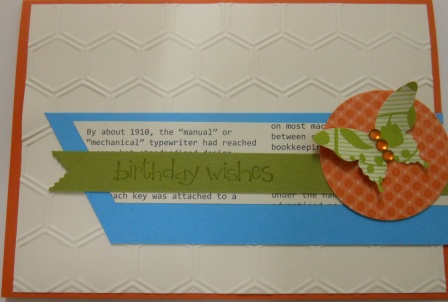
The first one was CASED but I don't know who from. If you recognise your work thank you for the inspiration. I used Tangerine Tango card and teamed it with Very Vanilla, Tempting Turquoise and Old Olive. Don't you just love the Colour Coach for helping you put colours together? I sat the Elegant Butterfly Punch on a 23/4 inch DSP circle. The Birthday sentiment is from an old SAB set called So Happy for You. I keep dragging it out as I love the font.
This one I had to really scramble to get things to work. I thought I had Pool Party ribbon but I must have used it all, so I got my Very Vanilla Seam binding ribbon and dragged it through the Pool Party stamp pad. Yuk, that looked dreadful it didn't look at all like Pool Party. So I decided to wash it out and "what do ya know" it came out this nice Pool Party colour. Yipee... I then wanted it to look scrunchy so I squeezed it up and then put the heat gun on it to dry it out and set the creases. I stamped the Happy Birthday sentiment with Versamark and embossed it with White embossing powder. I then used a paint dauber and Pool Party ink to colour over the card. I rubbed the ink off the embossing with a tissue to make it pop.

My last card is my favourite. I have been wanting to play with this Dress Up Framelit Die for some time. Anyone that knows me and my little ladies will know how excited I was when I saw this in the catalogue. The sentiment came from the All Dressed Up stamp set. I used Early Expresso Co'ordinations card on the dress stand to get an aged look.

Monday, November 26, 2012

Surfie girl

My friend asked me to make a 21st birthday card for her daughter. She wanted something beachy as she is always at the beach surfing. This is what I came up with.
I sanded back some Early Expresso Coordinations to make it look very, very rough. Of course I had to try some more brayering. I made the sun by masking after I had brayered a layer of Daffodill Delight. I then covered the sun and brayered the sky. The water was created by wrapping cotton around the brayer and then loading up with Indigo Blue. I ran it over scrap paper a few times to weaken the strength.The sand was squiggled with the White gel pen along the water's edge.
Next came my little surfer girl. She was made with White gloss card and I brayered it with Pink Pirouette. The surf board was brayered by masking one side and then brayering with Summer Starfruit. I then masked that side and brayered the other side with Primrose Petals. Her hair was cut from sanded Early Expresso coordinations card.


This is what she finally looked like minus the 21 that I added and forgot to photograph. Do you recon she will like it?

Thursday, September 20, 2012

Card#5

Oops sorry I thought I had posted this.
Well this is the last of my top 5 favourites from the new catalogue. There were so many to choose from and of course I don't have them all yet. My wish list gets longer by the day. Why not organise a workshop with a few friends and I can show you all the great projects I have been working on so far.

This card was made from the new Coordinations cardstock. It has a different coloured core, so on sanding it back you get a different coloured layer. Using it with the new Woodgrain embossing folder it gives a really life like look of tree bark.

This is a cute little card as it is folded in an uneven gate fold and the Owl sits over the opening and is held together with a scallop oval. Gee I didn't explain that very well. Sorry!! I hope the picture below shows it better than I described it.

I sponged the Pacific Point circle to make it look like the sky behind him.

I hope you enjoyed my top five. 

Stay tuned as I am going to be holding a couple of childrens workshops over the school holidays, so if you are interested email me or phone to book in.

ALSO don't forget if you want to take part in the Paper Angels Christmas Card Workshop you will need to book in soon as some of the venues are already full.

Cardstock: Coordinations Early Expresso, So Safron, Pacific Point, Crumb Cake,Early Expresso, Whisper White, Chocolate Chip
Ink: Pacific Point
Stamp sets: Little friends
Punches: Build a bird, Owl punch,13/4" scallop circle, 11/4"circle, word window, decorative label
Accessories: Woodgrain embossing folder

Thursday, September 13, 2012

Groovy baby....

I was asked to make another of my little ladies. This one is for a young lady turning 17. Her aunty asked if it could be something groovy like my other birthday lady. Well not wanting to make exactly the same card again I pulled out all my Designer Series Paper till I found one that got my brain a churning.
I drew my girl up, sponged around her and then dressed her in the groovy (retired) DSP. Then I cut her hair out of the new Coordinations card stock in Early Expresso and then ran it through the woodgrain embossing folder.
The stack of pressies was made using Melon Mambo card embossed and glittered, Pool Party and So Saffron. I cut the 17 free hand.


Don't you just love her groovy shoes, they were a little tricky to cut out but worth all my breath holding.

Her sunnies were made using Acetate coloured with a red felt pen and then rubbed off to just leave a stain. I then punched them out with the Owl punch and set them up with Glue dots.
The background is supposed to resemble a Disco with dripping lights and kooky lanterns. Do you think I achieved that?


Cardstock: Melon Mambo, So Safron, Pool Party, Early Expresso, Skin Tone
Ink: Pretty in Pink
Accessories: Pink Seam binding ribbon, Basic Rhinestone Jewel, Stripes embossing folder, Square Lattice embossing folder

Monday, June 25, 2012

More little ladies

Liz Collett had made some cute wall frames using the Attic Boutique Designer Series Paper (DSP). the paper is so lovely it doesn't really need anything else BUT as I am in this crazy little lady faze, I suggested they could look nice with a little lady on them. She asked me if I could do that for her. So this is what I came up with.
The hair was cut from the Attic Boutique Designer Series Paper DSP as well. It was just a matter of finding the right piece that looked like curls. The dark haired girls were cut from Early Expresso card. The blue flower was cut using the scallop circle and then used the faux suede technique.
The pleats on the red skirt was created using the crimper, spritzing with water and then shaping it. I had to add the sliver of Early Expresso to make the bodice stand out.


The face and skin uses First Edition Specialty DSP. The dress was  Attic Boutique DSP from the Autumn Winter Mini Catalogue
Related Posts Plugin for WordPress, Blogger...