Search This Blog

Would you like to join Stampin' Up!® - Come join my team, get discounts and make new friends. As long as you are in Australia you can join my team.
Showing posts with label card zena kennedy independent Stampin' Up! demonstrator. Show all posts

Sunday, July 7, 2019

THE STORY OF A BLOSSOM


Picture this: a tiny seedling on the verge of breaking through the soil. Can you see it? Now water it with affection and good vibes. What do you have after a little bit of time and a whole lot of love? A blossom—bold and beautiful and blooming!

Now imagine that in a stamp set. With the Bloom & Grow Bundle, you can see the entire story of the blossom: from tiny seedlings to beautiful bouquets. Then sprinkle in some encouraging sentiments, and you’ve got a card for everyone you love!

If you’re just beginning on your stamping journey, you can use these gorgeous stamps to create a patterned look for a simple but beautiful project as we did in our You Are Simply Wonderful sample, or if you want to step it up a notch, try tinkering with the dies and a blender pen, as we did in the Thanks sample. For all of you avid stampers, roll up your sleeves and add this bundle and some ribbon to a treat bag to make the cute bag you can see in the samples. There are so many options!

Monday, July 1, 2019

TO A WILD ROSE


Roses are always nice to have, and you can never have too many. How about giving someone a dozen wild roses … in stamps! With the To a Wild Rose Bundle, you can sprinkle every occasion with roses and warm wishes to everyone around you. This stamp set was inspired by Mary Ellen Byler, To a Wild Rose is one of our Distinktive stamp sets. That means it has so much depth and dimension, it might as well be the real thing. By layering the ink with a Sponge Dauber, or colouring in the beautiful images with Watercolor Pencils, these Distinktive stamps can come to life even more, and they are bound to leave an impression!

Thursday, December 27, 2018

The Year-End Closeout Is Almost Over!

We’re sad to say it, but the Year-End Closeout will soon be at an end. I'd just like to remind you to take another look at the selection of retiring and surplus items that are still available, and place your orders by 2 January. You wouldn’t want to head into the new year with any regrets, after all!

Head on over to my Online shop and use the hostess code AKHGHX9E to receive a thank you gift from me

Saturday, April 21, 2018

Playing with my Stamparatus

I was one of the lucky ones that managed to get my Stamparatus early. After watching many YouTube videos and playing in my studio I am excited about what I am going to do with many of my stamp and framelits bundles.

I am going to make templates and store them in with my stamp sets. Let me show you my first.
I was asked to do a class on the Oh So Succulent stamp set, however it has so many framelits to go with the stamps that it would not have been possible to do in a class with 6 people in 2 hours.

Now I can see this could be possible.

1. I started with placing all the stamps that I wanted to use on to Whisper White card, these all have matching framelits. Firstly the solid stamps and then pressed the side plate over them. Next I placed the outlined stamps on the Whisper White card, pressed the top plate over them.


2. I used my stamping spots for inking up all the stamps and I was not particularly worried about the colours I used, as this is the template. I stamped the solid stamps first.


3. I then inked the outlined group of stamps.


4. I then stamped the outline stamps over the solid images. Even at this stage I was very impressed with my new toy!!


5. Then I placed the coordinating framelits over the images, running them through the Big Shot.


6. I wanted to make sure they didn't move so held them down with Washi tape.


7. Now to see if the template would work, I cut out all the images in Very Vanilla.
My fingers were crossed at this stage.


8. I placed the Whisper White card (template) back in the Stamparatus and then inserted the Very Vanilla cut out pieces.
Now to see if it would do what I hoped!!!


9. This time I stamped the outline images first.
I was impatient to see if it worked.


10. Then came the solid stamps.
Yes, yes, yes. It all lined up.


11. So now I have a template to use. I am going to cut out as many framelits as I need for my class and  then I'm sure we can get through all the stamping. I will keep this template in with the stamp set.

This got me looking through all my stamps and framelits. I am going to set aside a day and create templates for them all.


Phew did you stick with me till the end? I am so happy with this and can't wait to share it with all my friends and team. Yipee a new favourite tool!! Well who am I kidding, the Envelope Punch Board is still my favourite but this is a close second ;)

WHO WANTS TO COME AND PLAY???

Friday, March 30, 2018

I'll stop soon - I promise!

I hope this is not too overwhelming for you! I just get soooo... excited about these Free items and want everyone to make the most of them. I promise I will stop soon, tee hee.

This stamp set is quite different and some people are asking if there is something wrong with the stamp, as when they look at it the grooves on some parts don't look like they are cut. This is a new style of stamp that Stampin' Up! have designed, it is called (patent-pending) Distinktive style, which lays down the ink at different opacities, giving the finished image more depth.


This one is gone after midnight of the 31st March.

A favourite of mine

Does anyone else see Anzac in these stamps? The flower looks so much like a Poppy and the rising sun just looks like the badge on our soldiers hats. Can you see that too?


There is a bit of good news with this set. Because it has been so popular, Stampin' Up! are including the Framelits in the new Annual Catalogue to be released in June.

Tuesday, March 27, 2018

You'll Love Lavender

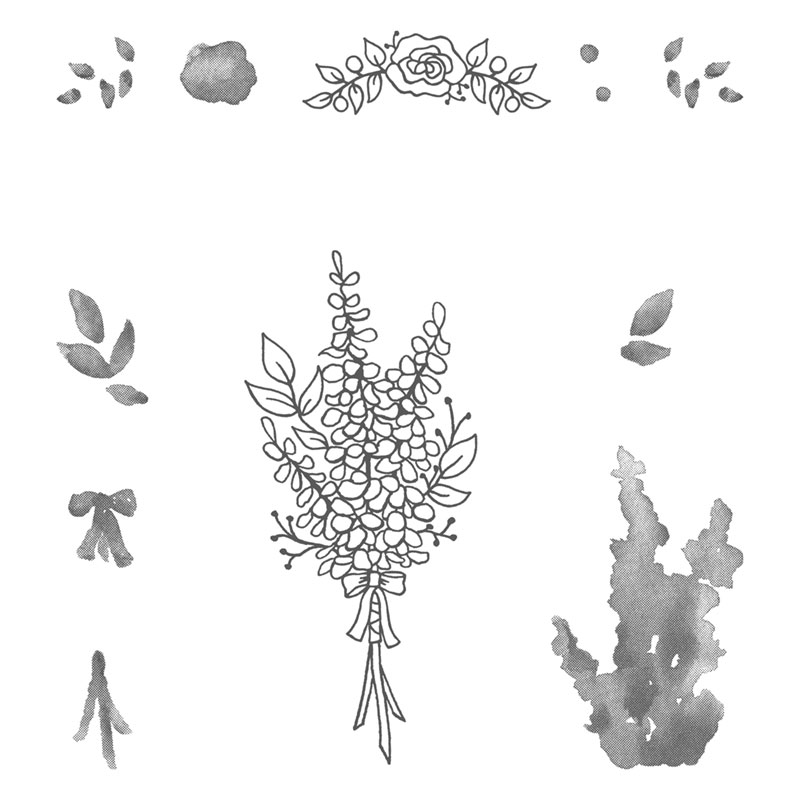
There are only FOUR days left to Sale-A-Brate! What do you all think of this product of the week? It is the lovely Lots of Lavender Stamp Set. Do you want to do some last-minute shopping? Once you spend $90 you could get this stamp set for free!


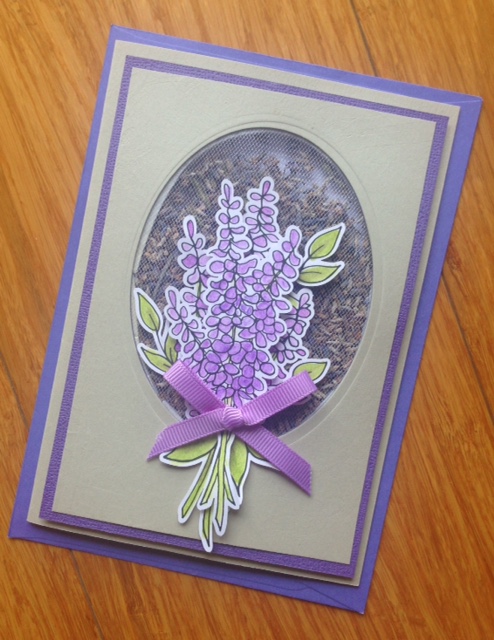
Isn't this a gorgeous project?


My friend Leisha Ward made this lovely card for me for my birthday. Look closely, it is a shaker card with a difference. It is filled with lavender. I love it.


Not sure what to buy to make up $90? Check out the Clearance rack, with 60% off you can get a lot.


Monday, December 4, 2017

Tags & Trimmings


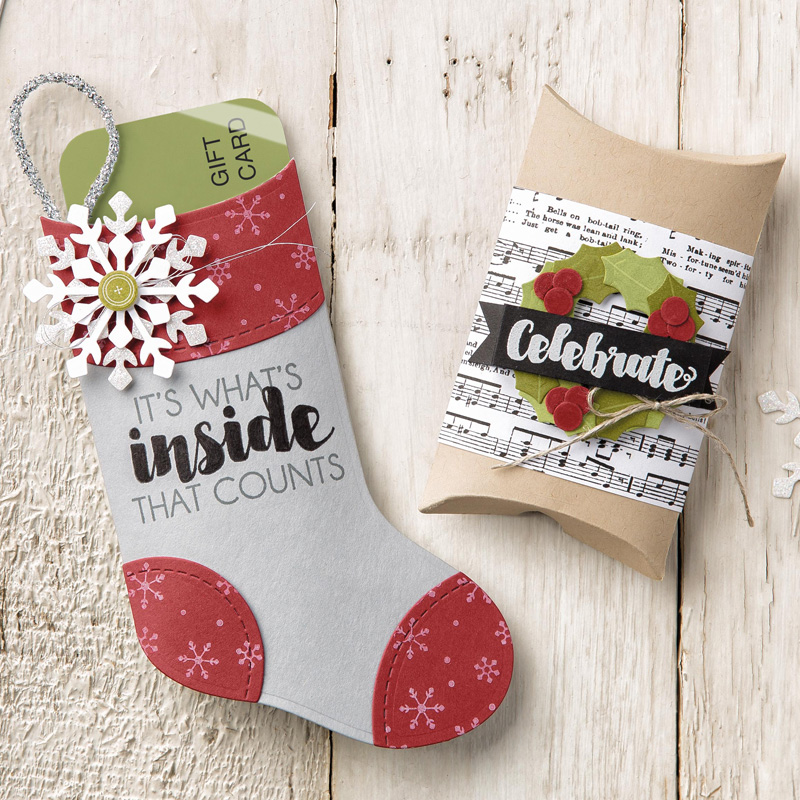
This week Stampin' Up! have a brand new video featuring the Trim Your Stocking Thinlits™ Dies! This bundle is a must-have for all holiday crafting. I've seen it used as an Advent Calendar by some of the clever demonstrators. How cool would that be? Watch the video and then tell me how you’ll trim your own stockings! If you would like to order the Tags & Trimmings bundle contact me and I can place an order for you, or shop Online using my December Hostess code.

Friday, October 20, 2017

Shine Bright like a Diamond

Shine Bright like a Diamond


One of the best things about many of our stamp sets is their flexibility. Many elements can be used for any season with the right kind of cardstock, Designer Series Paper, or ink colour. This week, our concept artists have used the elegantly adorable Season to Sparkle Stamp Set to create projects for Halloween, Christmas, and Valentine’s Day–all from the same set!


Saturday, May 13, 2017

Simple does it

Why do we all look for fancy cards, lots of arty farty techniques to come up with a gorgeous card? I had a special request for a class with very simple cards. Only 2 people were to attend this class, one that had never crafted in her life before.  I created 3 cards and we spent a lovely morning getting excited about how simple can be so classy.

One was a Rip and Flip card. Cut some Designer Series paper an inch longer than the card base, now rip it! Now, flip one of the pieces and adhere, add a sentiment and a cute peg, Voila!!


Such a pretty uncomplicated card, don't you agree?

Stamp a beautiful lady, add a sentiment and a 3D balloon only one layer and yet another simple card is created. The morning is going well and we are all having fun.


Finally stamping a load of baloons, add a 3d baloon, stamp a sentiment in a banner and the third card is completed.


Three simple cards, no stress and everyone had a lovely morning. I think I need to do this more often.

Related Posts Plugin for WordPress, Blogger...